

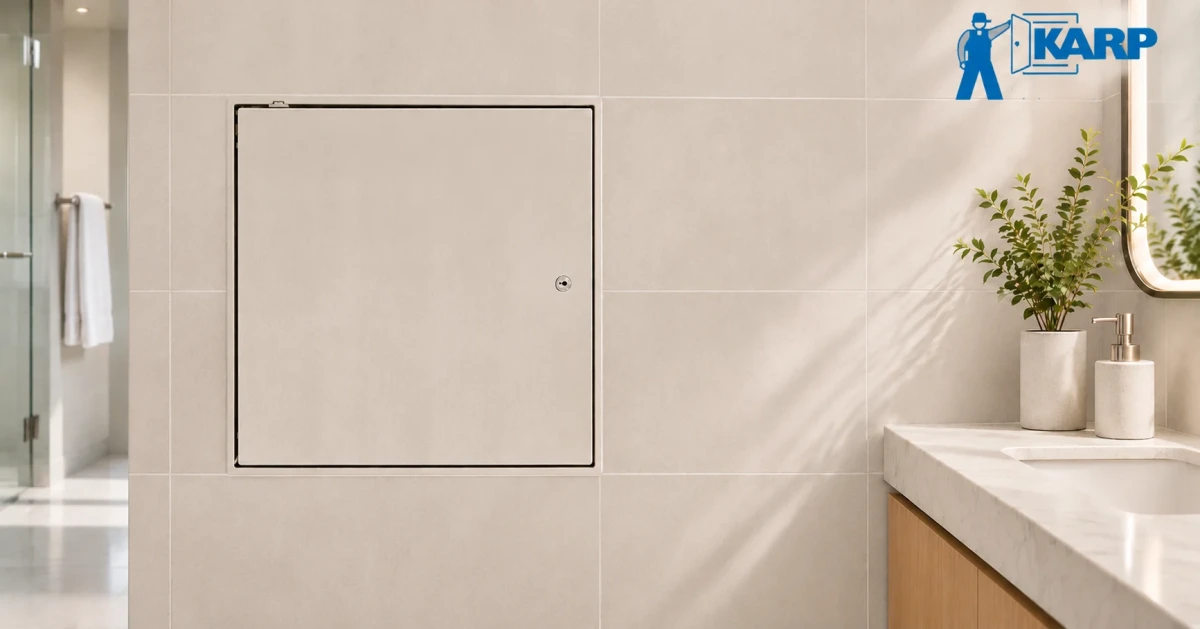
Recessed access panels for tile, drywall and plaster compared: recess depths, the door + 1/8 in opening rule, RDW vs RDWPD, ceilings and fire rated walls.
A recessed access panel does one thing a flush panel cannot: it takes the wall's own finish on its face. Tile, drywall or plaster goes into a shallow tray in the door, the frame is buried in the surrounding surface, and once the work is done only a thin perimeter line shows where the door opens.
That only works when the panel is matched to the finish. Each surface needs a different recess depth, a different way of holding the infill and a different trade to put it in. A drywall door in a tiled wall leaves the tile standing proud of the frame. A tile door in a plaster ceiling gives the plaster nothing to grip. This guide compares recessed access doors for tile, drywall and plaster side by side, explains the opening rule they share, and ends with the checks that decide which one to order.
What makes an access panel "recessed"
Access panels finish against a wall or ceiling in one of three ways. A surface mounted door sits on the face of the wall with its frame showing. A flush door, such as the KDW flush door for drywall or the DSC-214M for all surfaces, has a primed steel face level with the wall, so it is hidden by paint rather than by material. A recessed door has its face set back to form a tray, and that tray is filled with the same material as the surface around it.
The recess is sized for one kind of infill, which is why there is no single recessed access panel that suits every wall. Karp's recessed doors are built around three different numbers:
- Tile: the DSC-210 accepts tile up to 1 inch thick.
- Drywall: the RDWPD carries a 5/8 inch drywall insert installed at the factory, and the RDW takes a piece of drywall fitted on site.
- Plaster: the DSC-210PL is recessed 1/2 inch and lined with self-furring metal lath.
Recessed doors are the main way a service opening is concealed, and Karp groups the drywall models under concealed access doors. For the wider picture, including gypsum ceiling panels and paint finish levels, see our guide to hiding an access panel properly.
Recessed access doors for tile, drywall and plaster compared
| Model | Surface | What goes in the recess | Who fills it | Wall or ceiling opening | Standard sizes (in.) |
|---|---|---|---|---|---|
| DSC-210 | Tiled walls and ceilings | Tile up to 1 in. thick | Tile setter, as part of the tile run | Door size + 1/8 in. | 12 x 12, 18 x 18, 24 x 12, 24 x 24, 36 x 24 |
| RDW | Drywall walls and ceilings | Drywall piece cut and fitted on site | Drywall crew, then the taper | Door size + 1/8 in. | 12 x 12, 18 x 18, 24 x 12, 24 x 24, 36 x 24 |
| RDWPD | Drywall walls and ceilings | 5/8 in. drywall, factory installed | Factory; the taper finishes the bead | Door size + 1/8 in. | 12 x 12, 18 x 18, 24 x 12, 24 x 24, 36 x 24 |
| DSC-210PL | Plastered walls and ceilings | Plaster over self-furring lath, 1/2 in. recess | Plasterer, as part of the coat | Door size + 1/8 in. | 12 x 12, 18 x 18, 24 x 12, 24 x 24, 36 x 24 |
| KATR | Suspended drywall ceilings in fire rated floor-ceiling assemblies | Steel with a double thickness of drywall | Per Karp's product documentation | Smaller than the door (see below) | 12 x 12, 18 x 18, 24 x 24, 30 x 22 |
Four of the five share the same sizes and the same opening rule. What separates them is the recess. Choose by the finish that will cover the door, not by the size.
The opening rule: door size plus 1/8 inch
On the DSC-210, RDW, RDWPD and DSC-210PL, the wall or ceiling opening is the door size plus 1/8 inch in each direction. A 24 x 24 door needs a 24 1/8 x 24 1/8 inch hole. A 36 x 24 door needs 36 1/8 x 24 1/8.
That is tighter than Karp's flush drywall doors, where the opening is the door size plus 3/8 inch, as covered in our guide to installing an access panel in drywall. Cut a recessed opening to the flush allowance and there is an extra 1/8 inch of gap on every side. On a flush door that gap disappears under the bead and compound. On a recessed door it sits right beside the joint that is meant to be invisible.
Two things follow. The hole has to be cut accurately, so mark it from the size table rather than by tracing the door. And the framing or blocking around it has to be square, because a recessed frame has very little room to be shimmed straight inside a racked opening.
Confirm rectangular sizes on the spec sheet
For the 24 x 12, read the opening for the exact model from its spec sheet before cutting. Karp's tile door page makes the same point for rectangular sizes, and it costs a minute against a recut opening in a finished wall.
The exception: the KATR ceiling door
The KATR works the other way round. Its listed opening is smaller than the door: 10 1/2 x 10 1/2 inches for a 12 x 12, and 22 1/2 x 22 1/2 for a 24 x 24. Karp's page says to use the exact opening listed for this model rather than an allowance taken from other doors. Apply the plus 1/8 rule to a 12 x 12 KATR and the hole will be 1 5/8 inches too big each way.
Recessed access panels for tile
A tiled wall shows every interruption, because the grout lines form a grid and the eye follows it. That is why a painted steel door in a tiled restroom looks like an afterthought. Karp's tile access doors let the tile itself become the door face. The DSC-210 accepts all makes and types of tile up to 1 inch thick in its recess, and its concealed pivoting bar hinge works out of sight, so the only metal showing is the thickness of the door and frame edge.
Measure the tile and the bed, not just the tile
The 1 inch is for everything that goes into the recess. The setting material and the tile together have to fit inside it and finish level with the tile on the wall. A standard wall tile on a normal bed is rarely a problem. Thick natural stone, or a large tile set on a heavy bed, is where the numbers get close. Set a sample tile on a bed of the planned thickness, measure the total and compare it with the recess before ordering.
Plan the door into the tile layout
Place the door on the tile grid before the opening is framed. If the door edges line up with grout lines, the tile setter can run whole or evenly cut tiles across the panel, and the perimeter joint reads as one more grout line. If the door lands in the middle of a tile, every tile around it needs a cut and the opening shows. Every DSC-210 size except the 18 x 18 is a whole multiple of 12 inches, which makes lining up with a 12 inch or 6 inch tile module straightforward. With other tile sizes, pick the standard door size that comes closest to whole tiles, or ask about a custom size.
Keep the perimeter joint clean
The joint between door and frame is what lets the door open. If grout or thinset bridges it, the door is glued shut. Tape the joint while the tile goes in, clean it out as the grout is struck, and open the door once before the grout cures. Where tilework stops against a different material, tile industry movement joint guidance calls for a sealant joint rather than grout (see this TileLetter summary of TCNA EJ171). The edge where the wall tile meets the steel frame is one of those places, so finish it with a flexible sealant, not grout.
Allow for the weight of the tile
Tile adds real weight to a door. A DSC-210 ships at 6.7 pounds in 12 x 12 and 32 pounds in 36 x 24 before any tile goes on, and the 36 x 24 then carries six square feet of tile and setting material. On large doors, and on any tile door in a ceiling, use the removable door option so the panel lifts clear, or Karp's double leaf option, which splits the opening into two lighter leaves.
Wet rooms and hygienic areas
Tile doors go where tile goes: restrooms, tub and shower surrounds, commercial kitchens and healthcare wet areas. The DSC-210 is offered in Type 304 stainless steel with a No. 4 satin finish for places where moisture or daily cleaning would wear a painted frame. Our guide to stainless steel access panels covers when that upgrade is worth it. A tile door is not a waterproofing detail, though. In a shower or wet wall, the membrane behind the tile still has to be detailed around the opening by whoever is responsible for it.
Recessed drywall access panels: RDW or RDWPD
In drywall, the recess takes a piece of board, and a galvanized drywall bead on the frame lets joint compound run over the flange. Once taped, sanded and painted, the door face matches the wall or ceiling around it. Karp makes two versions, and the real difference between them is who puts the drywall in.
The RDW arrives with an empty recess. The installer cuts a piece of drywall to fit and sets it into the door on site. That suits jobs where the board is chosen late, or where the drywall crew wants the insert cut from the same stock as the wall.
The RDWPD arrives with a 5/8 inch drywall insert already installed at the factory. There is nothing to cut or fit at the door, which saves time and removes the most common reason a recessed drywall panel shows: an insert cut slightly small or set slightly proud. If the wall is built with a board other than 5/8 inch, confirm the fit on the RDWPD spec sheet before ordering, or use the RDW and fit site board.
Both have a 16-gauge steel frame and door, a concealed pivoting rod hinge and a rust-inhibitive primer with baked white enamel. Both are removable for clear access, and both come in the same five sizes. Neither should be specified as fire rated, which is covered below.
Finishing decides more than the door does. Under raking light, or with a paint that has any sheen, a recessed drywall door needs the same finish level as the surface around it, or the edges of the tray will show through. For ceiling-specific choices, including all-drywall gypsum panels, see our guide to drywall ceiling access panels.
Recessed plaster access doors
Plaster needs something to key into. A drywall door's flat insert and compound bead are not made to carry a plaster coat, and plaster laid over smooth steel has nothing to hold it. Karp's plaster access doors solve this with lath.
The DSC-210PL is recessed 1/2 inch and lined with self-furring metal lath. The plasterer carries the surrounding coat straight across the face of the door, so once the finish is done the door sits hidden in the plaster and only the perimeter joint shows. Self-furring lath is made to stand off the surface behind it so that plaster can push through the mesh and lock in place behind it. The trade press explains why that embedment matters for plaster and stucco.
Agree the plaster thickness with the plastering contractor before the door is ordered. The 1/2 inch recess has to take the coat that finishes level with the wall around it. Like the tile door, the DSC-210PL is removable, can be built double leaf, and is offered in Type 304 stainless steel.
Recessed or flush in plaster
Not every plaster wall needs a hidden door. The DSC-214PL flush door for plastered surfaces has an expansion casing bead with galvanized lath, so the plaster finishes neatly against a visible door edge. Choose the DSC-214PL when the door should be easy to find and quick to open, and the DSC-210PL when it should disappear.
Exterior stucco is a different problem. On the outside of a building, water and insulation matter more than appearance, so read our guide to exterior access doors before putting any plaster door in an outside wall.
Recessed access panels in ceilings
The DSC-210, RDW, RDWPD and DSC-210PL are all made for walls and ceilings. Overhead, two things change. The infill hangs above people's heads, so weight and a secure latch matter more than in a wall. And access usually happens from a ladder, where a removable door that lifts out cleanly can be easier to handle than one that swings down. The sizes and the plus 1/8 opening are the same.
Rated floor-ceiling assemblies are a separate case. The KATR is designed for suspended drywall ceilings that form part of a fire rated floor-ceiling assembly, and it uses steel with a double thickness of drywall to maintain the assembly's fire-resistive qualities. Karp's product page does not state an hourly rating, and fire resistance depends on the complete assembly, so check the KATR documentation against the assembly required at that location before specifying it. Remember its opening is smaller than the door.
Recessed doors in fire rated walls
None of the four recessed wall models (DSC-210, RDW, RDWPD or DSC-210PL) carries a published fire rating, and Karp's own pages say not to substitute them where a listed fire rated opening is required. A rated wall needs a door from the fire rated access doors range, such as the KRP-350FR for drywall surfaces, installed to its listing. How to read a listing, and what voids one, is covered in our guide to fire rated access door requirements.
This is where hiding the door has to give way. If an opening must be found quickly for inspection, a fully concealed door is the wrong answer however good it looks.
Locks and hardware on recessed doors
Because the face is covered in tile, board or plaster, recessed doors use hardware that sits within the face. The options differ by model:
- DSC-210 (tile): RIM cylinder lock with night latch, cylinder lock, or spanner head lock. The spanner head is the tamper-resistant choice where the public can reach the panel, such as a restroom.
- RDW and RDWPD (drywall): flush screwdriver-operated cam and stud locks, or a key-operated cylinder lock with an automatic dust shutter.
- DSC-210PL (plaster): mortise preparation for any manufacturer's 1-1/8 inch mortise cylinder, including Best, Corbin Russwin and Schlage, a RIM cylinder lock with night latch, or a cylinder lock.
- KATR (rated ceilings): RIM cylinder lock with night latch or cylinder lock.
Settle the lock on the quote. Changing hardware after tile, board or plaster is on the face is far harder than choosing it before the door ships.
How to install a recessed access panel
The sequence is the same for every surface. What changes is which trade fills the recess.
- Confirm the finish build-up. Tile plus setting bed, board thickness or plaster coat, checked against the recess of the model on order.
- Frame the opening square. Add blocking so there is solid backing on every side, and cut to the door size plus 1/8 inch, or to the KATR's listed opening.
- Set the frame to the finished plane. The door face, once filled, has to finish level with the surface around it, so set the frame to where the finish will be, not to the backing.
- Protect the joint. Tape the gap between door and frame before any wet trade starts.
- Fill the recess. The tile setter tiles the DSC-210 panel in the run. The drywall crew fits the RDW insert and tapes the bead, or just tapes the bead on the RDWPD. The plasterer carries the coat across the DSC-210PL lath.
- Open the door before the finish cures. Then clean the joint and check that the latch turns freely.
- Paint or seal last. Keep paint out of the joint so the door is not painted shut.
Karp's installation training videos cover frame setting, and each model's spec sheet carries the details for that door.
Common mistakes with recessed access panels
- Choosing by the wall, not the finish. A drywall wall with tile on it needs a tile door. The recess has to suit what goes on the face.
- Cutting to the flush allowance. Plus 3/8 inch is for flush drywall doors. Recessed doors need plus 1/8, and the KATR needs its own smaller opening.
- Measuring tile without the bed. The setting material counts toward the 1 inch.
- Grout or plaster in the joint. It glues the door shut and is hard to cut out cleanly.
- A loose site insert. An RDW insert cut small or set proud shows through paint. Cut it carefully, or use the RDWPD.
- Ignoring the tile grid. A door that lands mid-tile is obvious however well it is finished.
- Heavy infill overhead without a plan. Large tiled or plastered ceiling doors need the removable or double leaf option considered at order stage.
- A recessed door in a rated wall. Unless the model's listing covers that assembly, it does not belong there.
When a recessed door is the wrong choice
Recessed doors suit openings that are visited occasionally. Where a valve, filter or cleanout is reached every week, the face takes knocks, and a damaged tile or plaster face is harder to repair than painted steel. A flush door from the standard access doors range is quicker to find and easier to touch up. For a shut-off valve that needs its own enclosure, a recessed valve box may suit better than an access door. And in fire rated walls, as above, a listed fire rated door comes before appearance.
Before you order a recessed access panel
- Name the finish and its full thickness, including setting bed or plaster coat.
- Match the model: DSC-210 for tile, RDW or RDWPD for drywall, DSC-210PL for plaster, KATR for suspended drywall ceilings in rated floor-ceiling assemblies.
- Confirm whether the wall or ceiling is fire rated. If it is, choose from the fire rated range or check the KATR documentation for ceilings.
- Pick the size from the standard range, lined up with the tile grid where it matters. Our access panel sizes guide explains nominal, door and opening dimensions.
- Read the opening from the size table: door plus 1/8 inch on the four wall models, the listed smaller opening on the KATR, and the spec sheet for the 24 x 12.
- Choose the lock, and decide on removable, double leaf or Type 304 stainless where they apply.
- Agree who fills the recess and when, and write it into the trade scopes.
- Download the spec sheet and CAD drawing from the architectural specifications library.
- Add the size and options to your distributor quote.
Standard sizes and options are listed on each product page. For a size outside the standard range or a detail you want checked, send the drawing to the Karp team. When you are ready to order, request a quote and an authorized Karp distributor will follow up with pricing and availability. Questions after installation go to Karp support.
Frequently Asked Questions
What is a recessed access panel?
What is the difference between a recessed and a flush access panel?
How thick can the tile be on a recessed tile access door?
What size opening do I cut for a recessed access panel?
Should I choose the RDW or the RDWPD for drywall?
Can you plaster over an access panel?
Are recessed access panels fire rated?
Can a recessed access panel be installed in a ceiling?

Karp Team
Karp Associates has manufactured access doors, floor doors and roof hatches in the United States since 1956, across fourteen product families. All products are made at the company’s facility in Melville, New York.
Need the Right Access Solution?
Explore Karp's USA-manufactured access doors, fire-rated panels, and custom solutions built for commercial projects.